
Dynamic devices can be used to connect Modbus RTU devices to NSnappy. You can also combine multiple radio devices (doesn’t work yet if the devices are provisioned to NSnappy, this will be fixed later) with this to a single control point. Added devices do not need to be provisioned to NSnappy as every channel is configured manually.
Dynamic Device will get its own virtual serial number and you can name the devices to easily identify them in the future.
Working order should be (assuming customer environment has already been setup):
-
If Modbus device, first configure it to the base station or Solid-Sky transmitter.
-
Create Dynamic Device.
-
Create Control Point for Dynamic Device.
-
Install the Dynamic Device to the Control Point.
Setting up a dynamic device
-
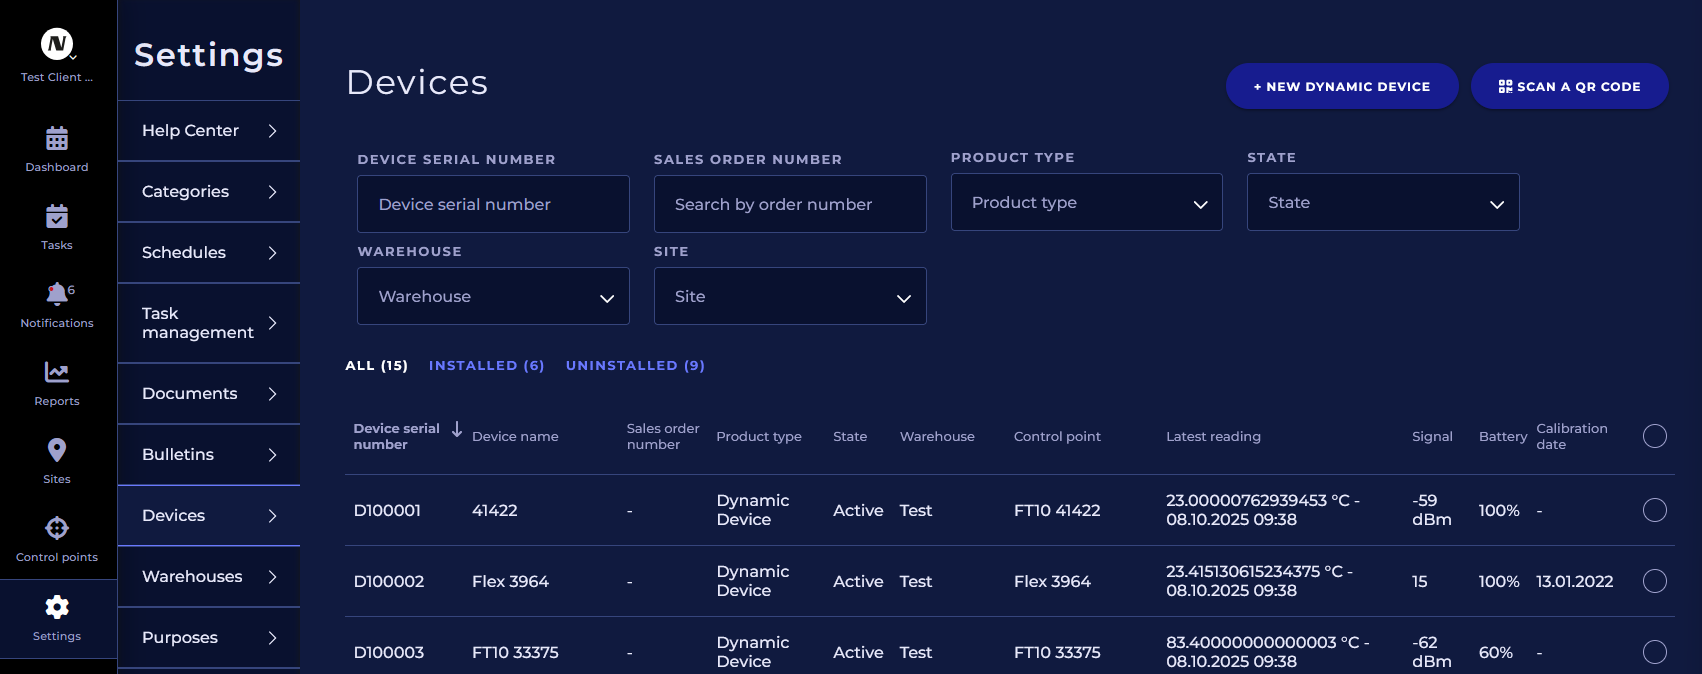
Create a new Dynamic Device by pressing +NEW DYNAMIC DEVICE in Settings → Devices.
-
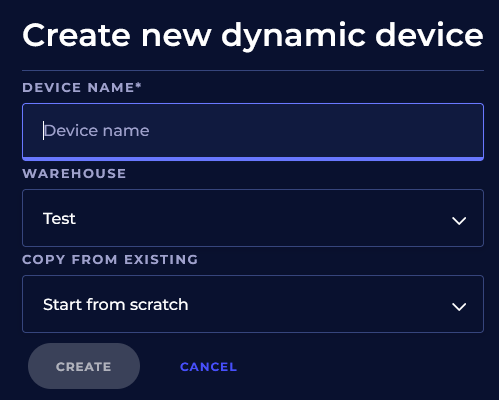
Give the device a name, select a warehouse to put it in. Good naming practice makes it easier to distinguish dynamic devices and install it on a control point afterwards. You can start from scratch or copy an existing dynamic device and edit details afterwards.
-
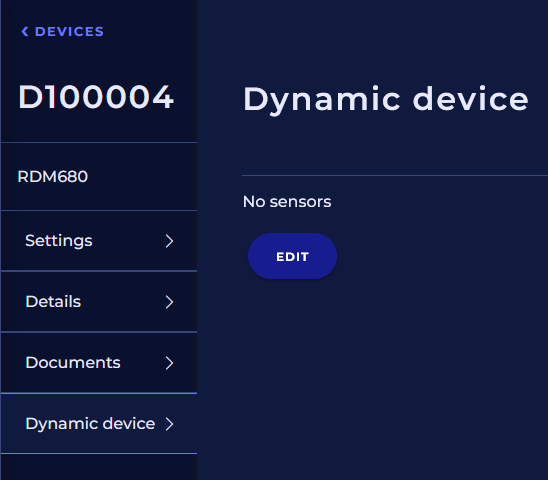
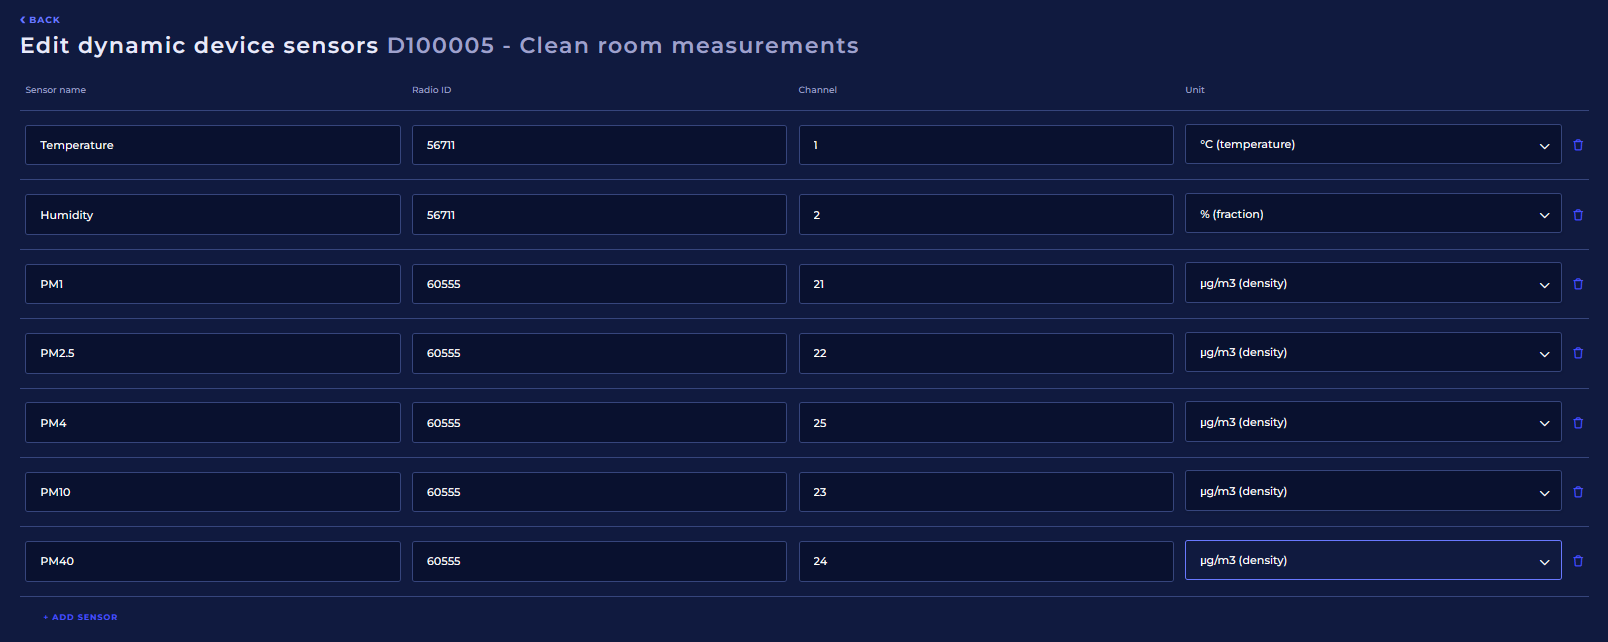
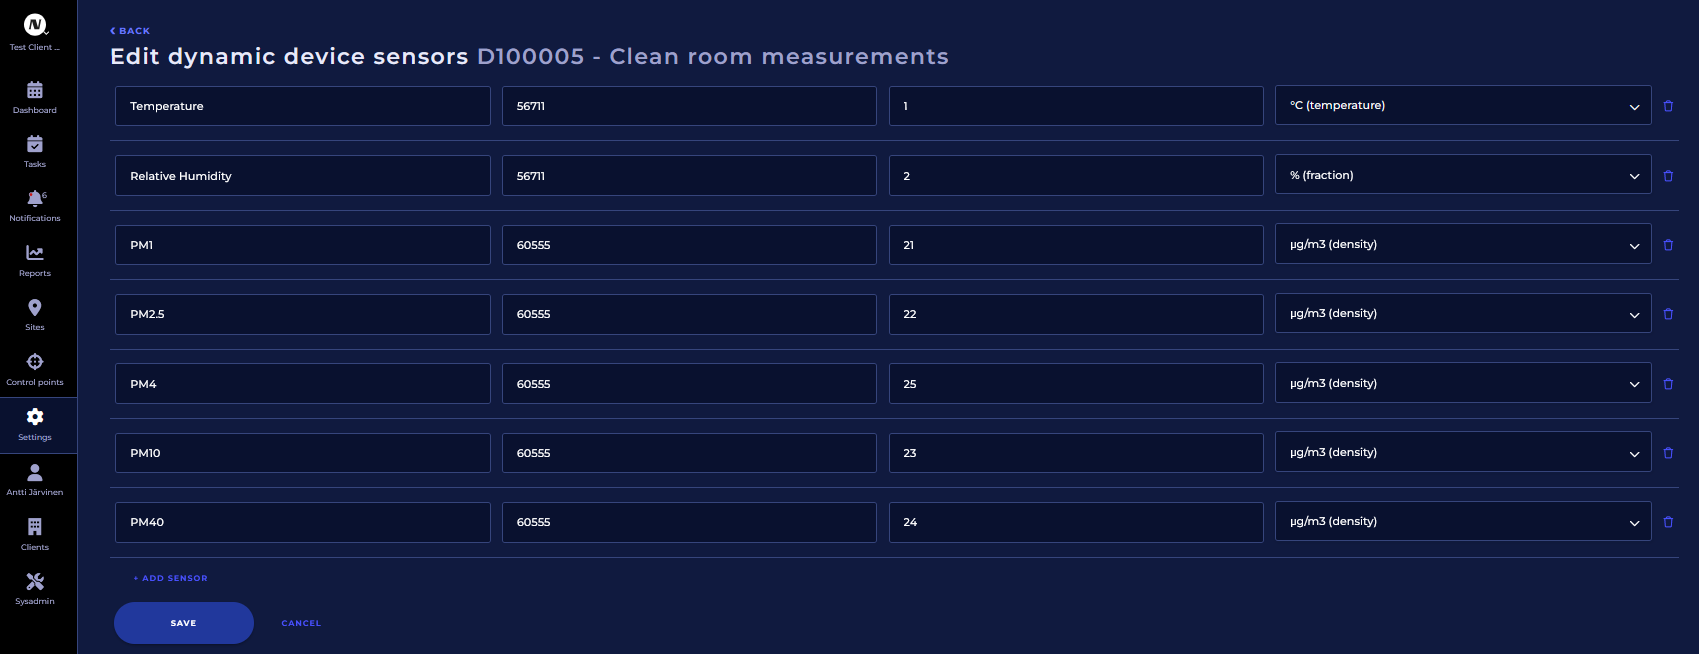
Click edit sensors (channels)
-
Give the sensor (channel) a name, radio ID or address or virtual ID generated by a basestation. For channel field enter the number of the channel used by a Sky-protocol device, for example Flex-Sky-T-RH has two channels: Channel 1 is temperature and Channel 2 is Humidity. For MTR-, FT10 devices and base stations that use MTR protocol leave the Channel field empty as MTR protocol devices only transmit 1 result per ID, so there are no channels.
Each sensor (channel) can come from any device that connects to NSnappy via a gateway/base station that is in the same customers warehouse where you are creating the new dynamic devices. This is to prevent overlapping ID numbers to save results on to the same sensor (channel) from another devices that has a matching ID. With Modbus RTU devices the IDs are virtual and when configuring them to base station be sure not to overlap IDs with with other devices that the customer has.
Here is an example how to configure RMD680 that has been connected and configured to a base station: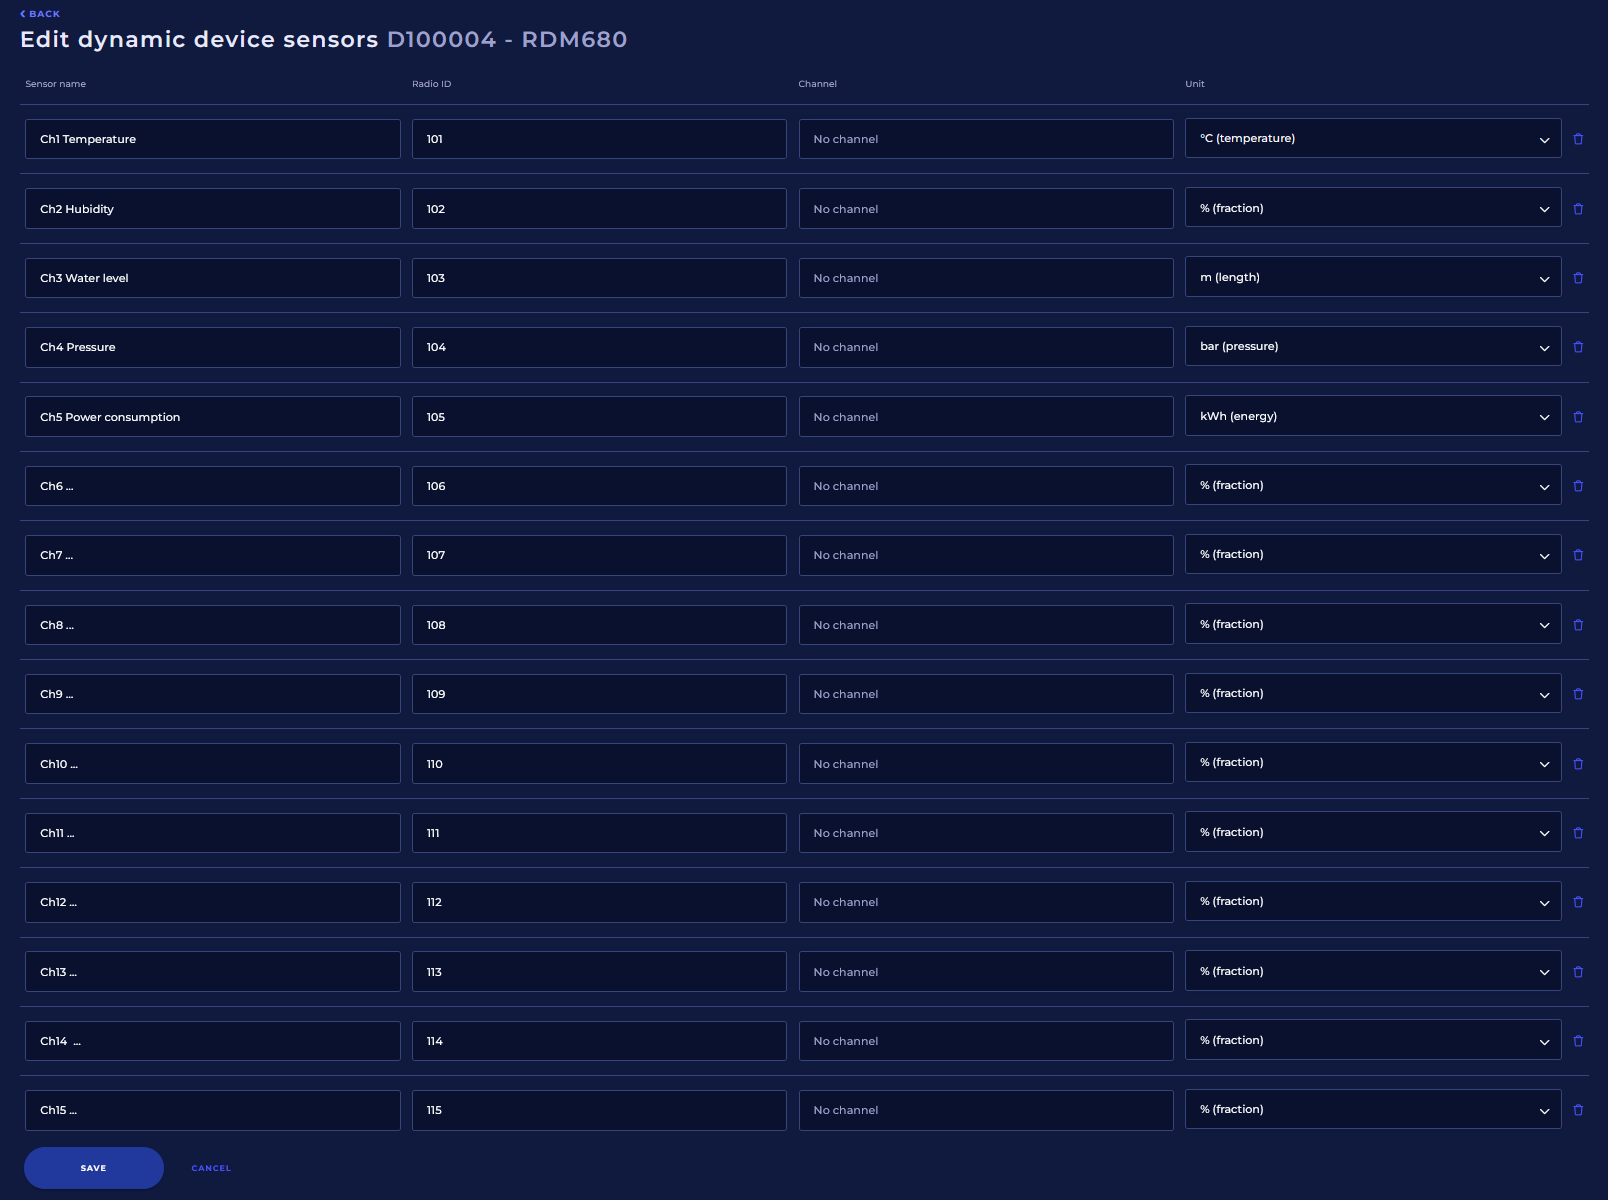
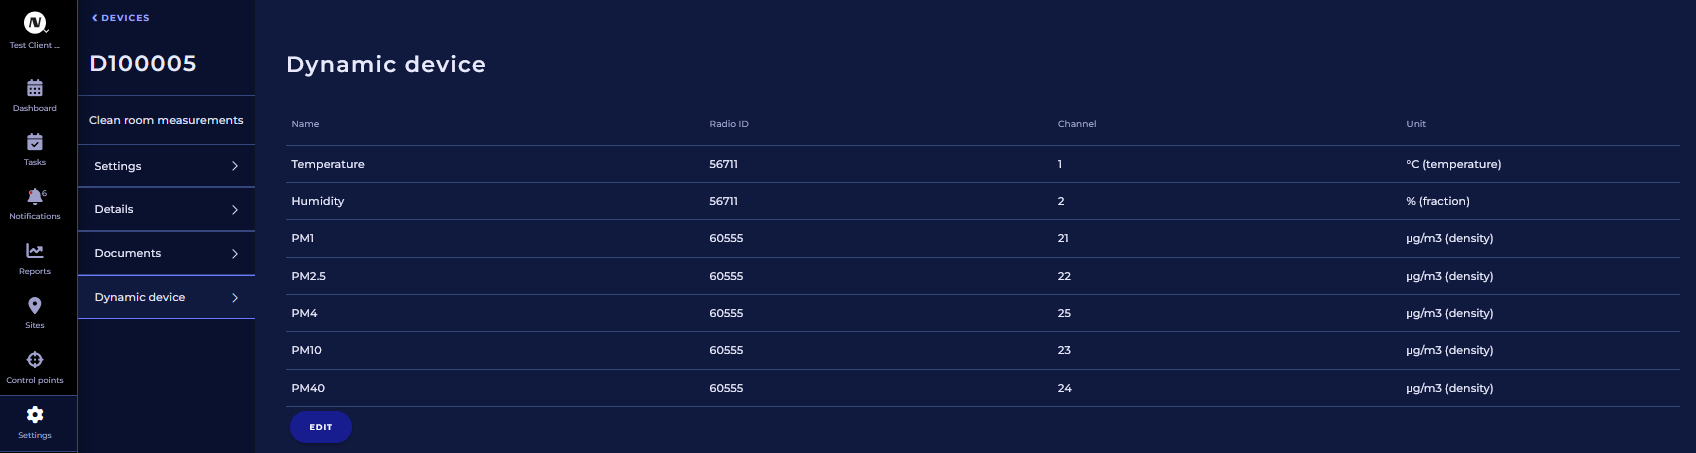
Here is an example how to configure two Sky transmitters as a single dynamic device (temperature and humidity comes from Flex-Sky-nSens-HT-EIS and particle measurement comes from Kube-Sky-PM0440):
Creating a control point for a dynamic device
-
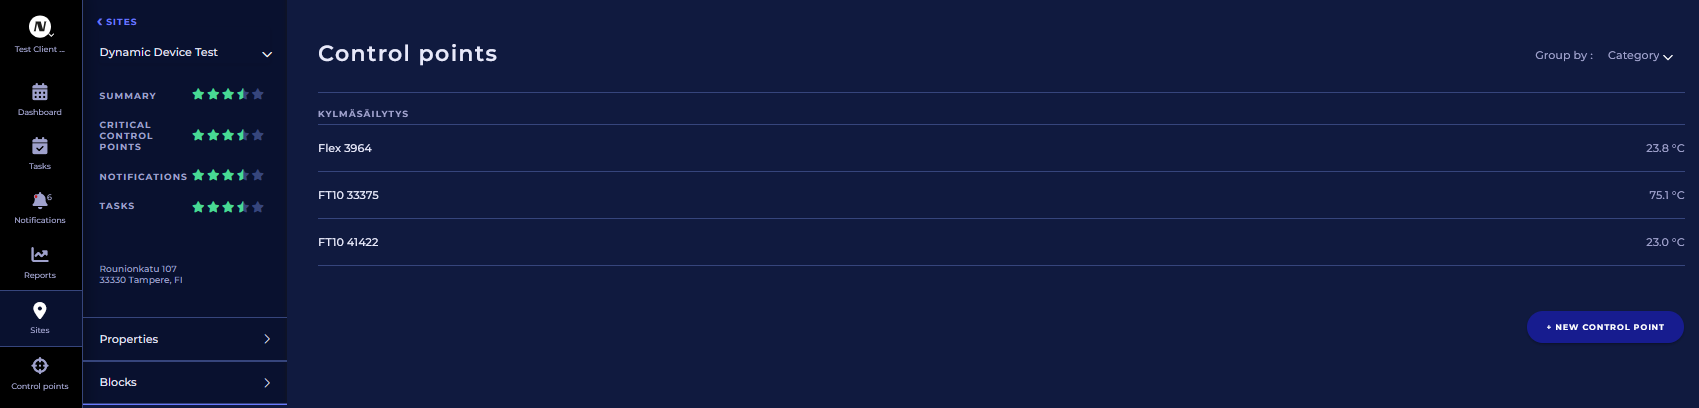
Go to a site where you want to create the control point and click on +NEW CONTROL POINT.
-
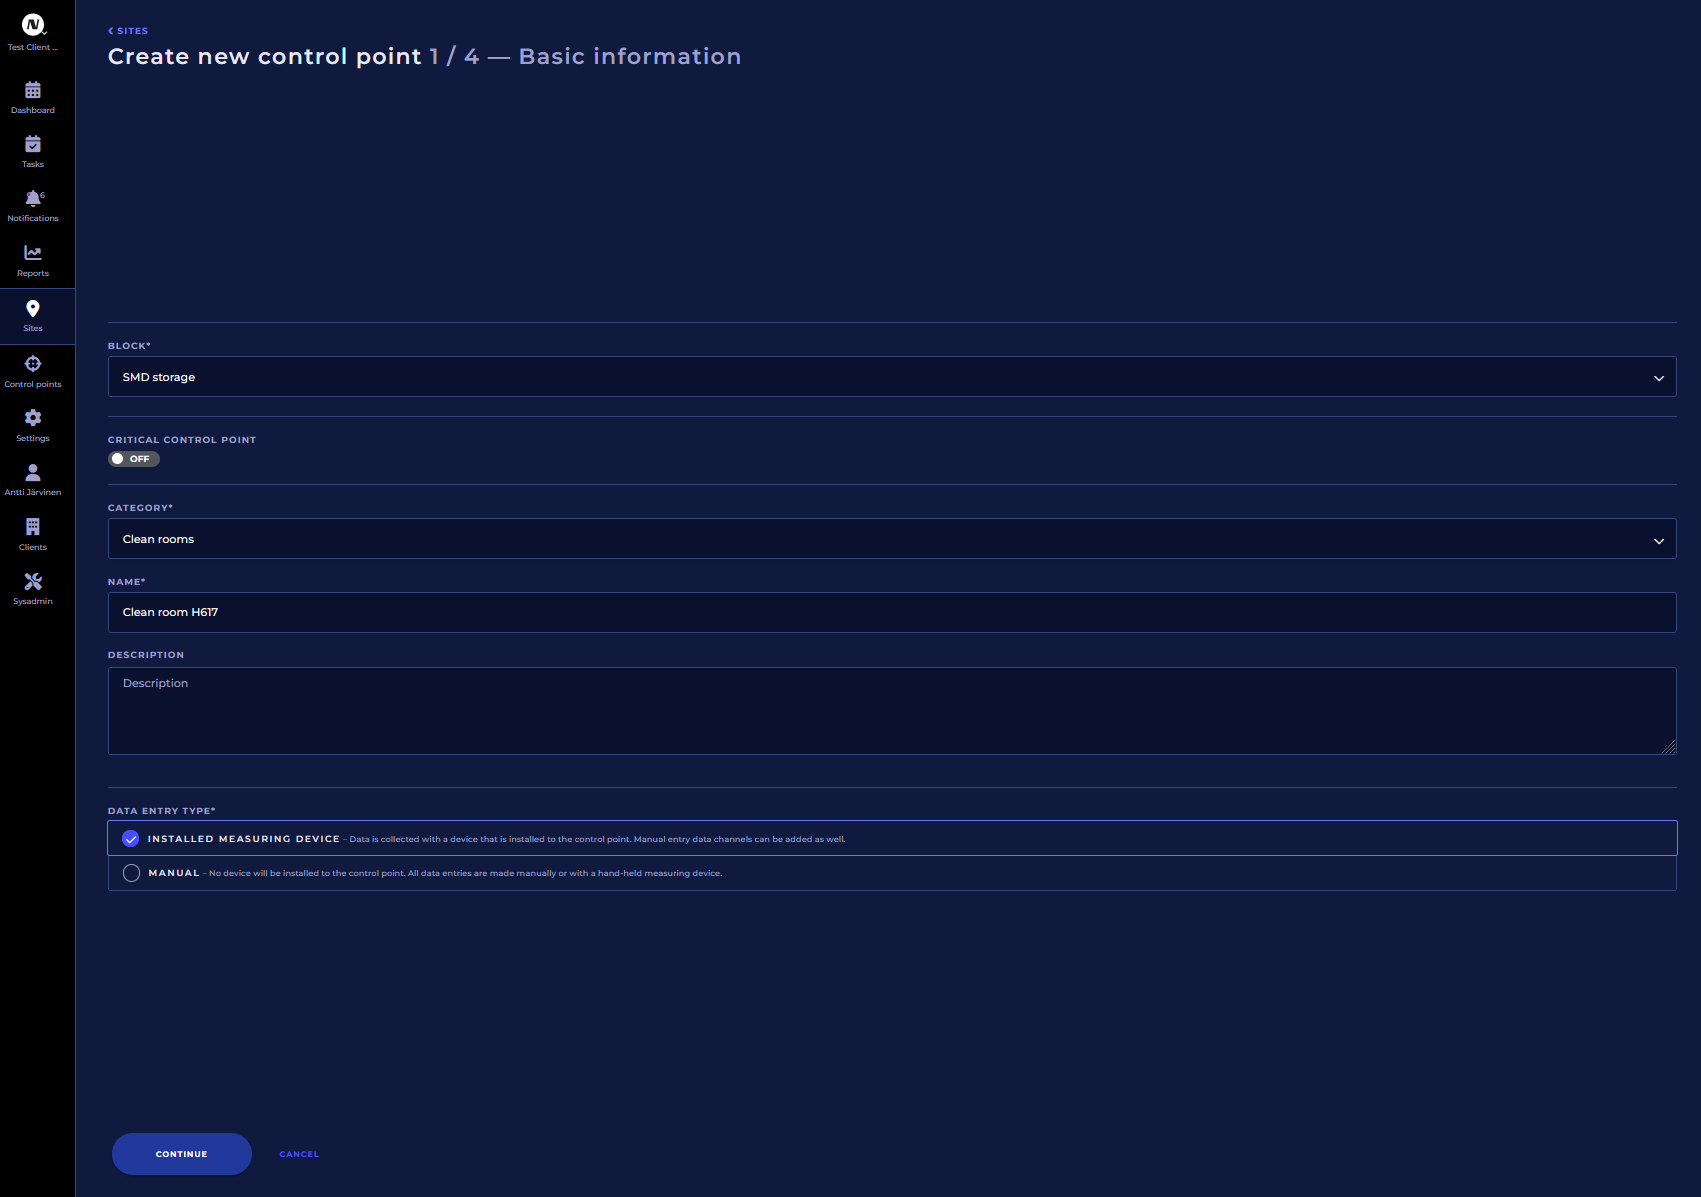
Fill in the details and check “INSTALLED MEASURING DEVICE” and click continue.
-
Select device type: Dynamic Device.

-
Select the dynamic device you want to use on this control point and click Continue.

-
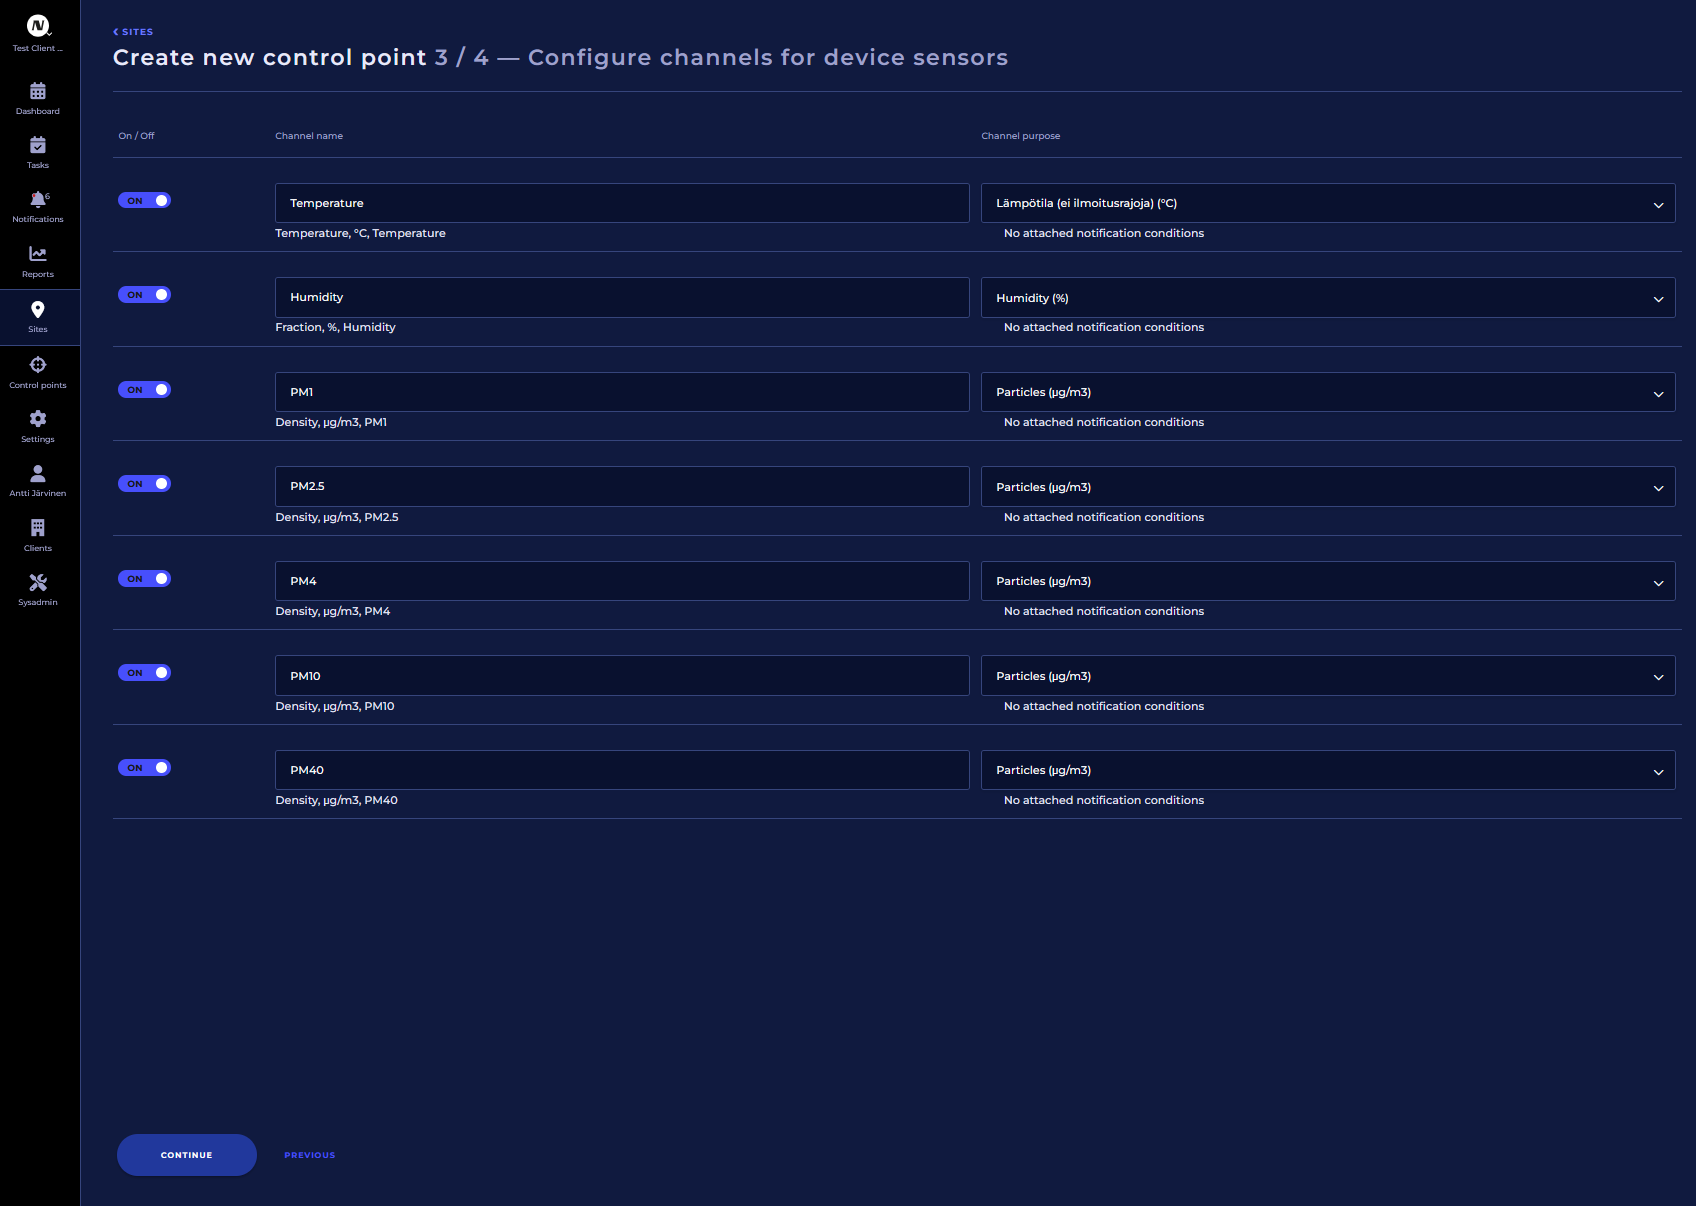
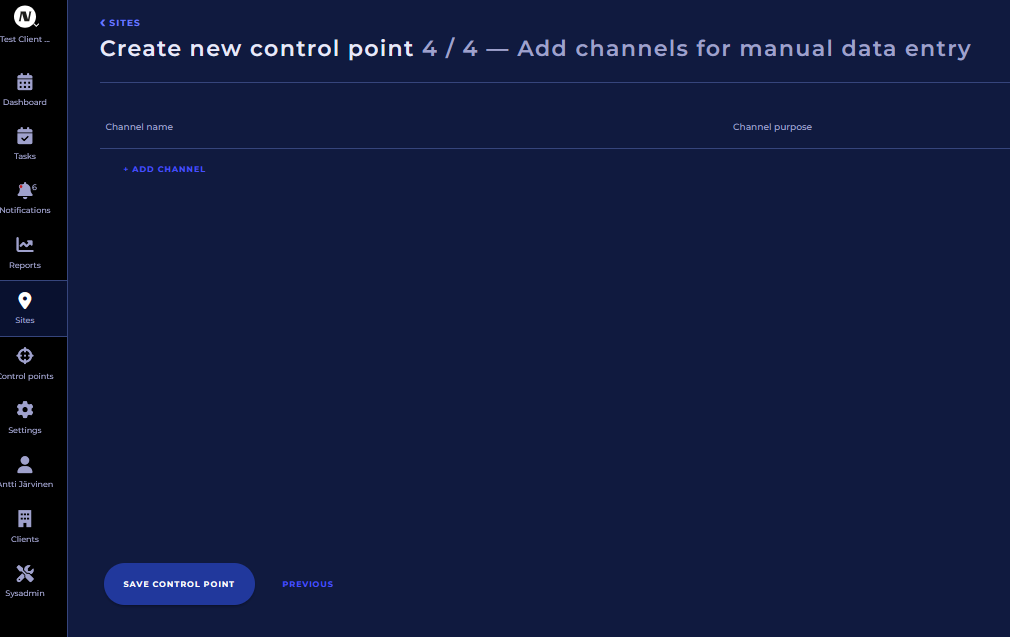
Rename the channels if you want and select correct purpose for each channel and click Continue.
-
Add manual measuring channels if you want, if not, then just click SAVE CONTROL POINT.
Installing a Dynamic Device to a Control Point
-
Click Install device.
-
Select the dynamic device you created for the control point and click INSTALL DEVICE.
Editing a Dynamic Device
-
Go to Settings → Devices and select the device you want to edit.
-
If the device is installed to a control point, first uninstall it, and after that you can go to Dynamic device menu and edit the channels from there.

-
After editing click Save.
-
Now the dynamic device can be installed again to the control point.